

There is something deeply satisfying about growing your own potatoes. Maybe it is the fact that you get to dig for them, an actual treasure hunt in your own backyard. Or maybe it is the sheer abundance of it:
One pound of seed potatoes goes in, and ten to fifteen pounds come back out. No other vegetable gives you that kind of return on investment, and almost no other crop is as forgiving of beginner mistakes.
The thing is, most online guides treat potato planting as if every American backyard is the same. They give you one set of planting dates, one soil recommendation, and one method, and then you plant in July in Arizona and wonder why everything died.
The truth is that how to plant potatoes successfully depends enormously on where you live in the United States, what your soil is like, and which variety you choose for your specific climate.
This article gives you all of that. Whether you are in the cool Pacific Northwest, the hot summer plains of Texas, the sandy soils of Florida, or the short-season Northeast, you will find exactly what you need here: the right timing, the right variety, the right method, and the right care to bring home a harvest worth bragging about.
Why Grow Potatoes at Home?
Before we get into the how, it is worth pausing for a second on the why, because potatoes really are one of the most rewarding vegetables any American home gardener can grow.
Read more: 7 Smart Tips: When Should I Pick My Tomatoes Perfectly
Extraordinary yield
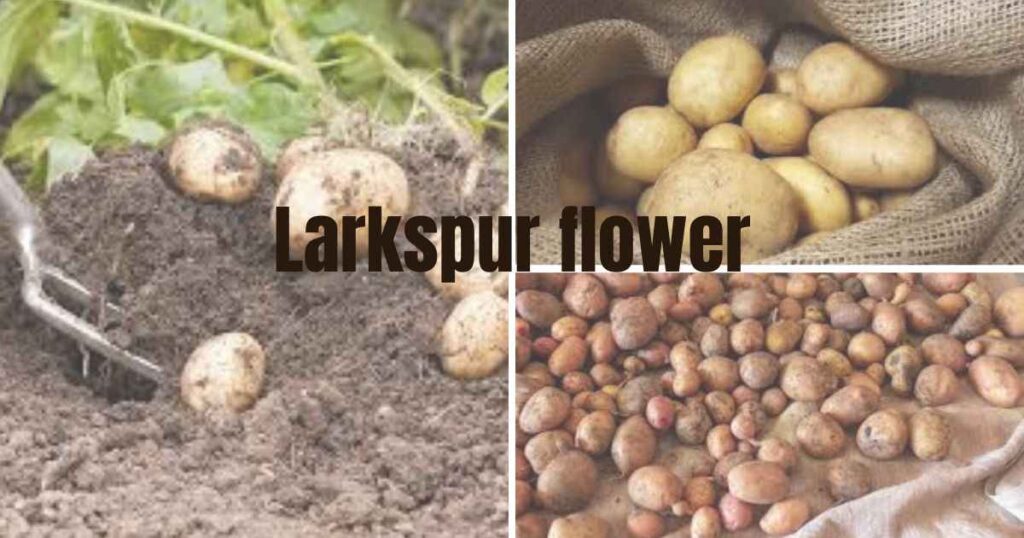
You get an extraordinary yield, not just a decent one. Typically, one pound of seed potatoes returns about 10 to 15 pounds by harvest. So plant 10 pounds of seed potatoes and you could realistically dig up 100 to 150 pounds of fresh spuds. That’s a ton of dinners right there, even if you’re busy and forget a few things along the way.
Flavor you cannot buy
Freshly dug potatoes have this sweet, earthy, almost layered flavor that pre-bought potatoes can’t match no matter what. The sugars haven’t yet had the chance to turn into starch. If you’ve never had a potato within a few hours after it was pulled from the ground, then you are likely in for a real, honest surprise.
Variety you cannot find in stores.
American grocery stores usually carry about 4 to 6 kinds of potatoes, or maybe slightly more, depending on the season. There are, in total, over 5,000 known potato varieties worldwide, and home gardeners in the US can end up growing hundreds of them:
purple, yellow, pink-fleshed, fingerling, blue, and heritage varieties your grandparents’ era used to grow. That sheer variety alone is reason enough.
Potatoes are, honestly, remarkably forgiving. You can grow them in containers, in raised beds, in grow bags, in traditional garden rows, and even in straw.
They manage with a range of soil conditions, and if you give them basic care, they repay you with a pretty generous harvest every time.
Understanding Potato Basics
What Are Seed Potatoes?
Potatoes do not grow from true seeds; they grow from pieces of tuber called seed potatoes. Each piece needs at least one “eye,” the small indentation from which the sprout emerges.
You can buy certified seed potatoes from garden centers, hardware stores like Home Depot and Lowe’s, or online from suppliers like Johnny’s Selected Seeds, Burpee, and Wood Prairie Farm.
Always use certified seed potatoes; never grocery-store potatoes.
Grocery store potatoes are often treated with sprout inhibitors that prevent sprouting. More importantly, they may carry soil-borne diseases that can contaminate your garden for years. Certified seed potatoes are inspected and guaranteed disease-free.
Potato Varieties: Choosing the Right One for Your Region
| Category | Best Varieties | Best For |
|---|---|---|
| Early Season (70 Days) | Red Norland, Yukon Gold, Irish Cobbler | Short-season regions, Southeast, and Texas |
| Mid-Season (80–90 Days) | Kennebec, Red Pontiac, Adirondack Blue | Most areas of the United States |
| Late Season (100–120 Days) | Russet Burbank, Katahdin, German Butterball | Long-season regions and long-term storage |
| Fingerling | Russian Banana, French Fingerling | Container gardening and gourmet cooking |
| Heirloom/Heritage | Purple Majesty, All Blue, Cranberry Red | Specialty growing and farmers markets |
Starch content matters for cooking:
- High starch (Russet): Fluffy baked potatoes and French fries
- Medium starch (Yukon Gold): Creamy mashed potatoes and roasting
- Low starch/waxy (Red Pontiac, fingerlings): Potato salads and boiling; they hold their shape
When to Plant Potatoes: USA Zone-by-Zone Timing Guide
This is where most guides completely fail American gardeners. Here is the full regional breakdown you actually need.
Northeast (Zones 4–6: New York, New England, Pennsylvania, New Jersey)
Plant seed potatoes 2 to 4 weeks before your last expected frost date, once soil temperature reaches at least 45°F. In most of the Northeast, this falls between late March and early May depending on your exact location and elevation.
- New York City and Long Island (Zone 7): Plant mid-March to early April
- Upstate New York and New England (Zones 4–5): Plant late April to early May
- Pennsylvania (Zones 5–6): Plant early to mid-April
Soil temperatures in the Northeast warm slowly; use a soil thermometer rather than relying on calendar dates alone. Cold, wet soil below 40°F will rot seed pieces before they sprout. If you are impatient, warm your soil with black plastic mulch laid two weeks before planting.
Best varieties for the Northeast: Kennebec, Red Norland, Yukon Gold, Katahdin, Adirondack Blue
Midwest (Zones 4–6: Ohio, Illinois, Michigan, Indiana, Missouri, Iowa)
The Midwest offers some of the most naturally ideal potato-growing soil in the country — deep, rich, well-draining loam with good organic matter. Plant from mid-April through mid-May depending on the zone and year.
Missouri and southern Indiana (Zone 6) can plant a full two to three weeks earlier than Michigan and northern Illinois (Zone 5).
For continuous harvests, stagger your plantings every two weeks from mid-April through late May. This gives you early summer new potatoes followed by main-crop potatoes in late summer.
Best varieties for the Midwest: Russet Burbank, Kennebec, Red Pontiac, Yukon Gold, German Butterball
Southeast (Zones 7–9: Georgia, the Carolinas, Tennessee, Alabama)
The Southeast is potato country in late winter and early spring. Plant early before the heat arrives, and your potatoes will thrive. Plant from late January through March depending on your zone.
- Georgia and South Carolina (Zone 8): Plant February through early March
- North Carolina and Tennessee (Zone 7): Plant late February through March
- Coastal Alabama (Zone 8–9): Plant January through February
The critical rule in the Southeast is to get your seed potatoes in the ground early enough that they mature before summer temperatures consistently exceed 85°F. Heat stops tuber development, so early varieties (70 days) are essential in the Deep South.
Best varieties for the Southeast: Red Norland, Irish Cobbler, Yukon Gold, Kennebec
Florida (Zones 9–10)
Florida is genuinely unique among American potato-growing regions. The state’s hot, humid summers make traditional spring planting impractical in most of the state. Instead, Florida gardeners grow potatoes as a cool-season crop in winter and early spring.
- North Florida (Gainesville, Jacksonville): Plant late January through February
- Central Florida (Orlando area): Plant January through mid-February
- South Florida (Miami, Fort Lauderdale, Zone 10): Plant December through January
Soil is nutrient-poor, and the hot, humid climate promotes disease. Use raised beds elevated at least 10–12 inches above ground level for better drainage, add generous amounts of organic compost, and choose disease-resistant varieties.
The University of Florida IFAS recommends applying fertilizer in two split applications, at planting and again three to four weeks later, rather than all at once.
Best varieties for Florida: Red Norland, LaRouge, Sebago, Atlantic
Texas (Zones 7–9)
Texas is big enough to have three different potato planting seasons depending on where you are:
- North Texas (Dallas, Fort Worth, Zone 7–8): Plant late February to mid-March for a spring harvest. In the fall, plant August through early September for a second crop.
- Central Texas (Austin, San Antonio, Zone 8): Plant mid-February to early March in spring; plant early September for fall.
- South Texas (Corpus Christi, the Rio Grande Valley, Zone 9): Plant January through February for a winter-spring harvest.
Most Texas soils run alkaline (pH 7.0 and above), which promotes potato scab. Test your soil before planting, and amend with sulfur to lower the pH to 5.0–6.5.
North Texas’s heavy clay soils require raised beds or containers; potatoes need well-draining conditions above all else.
Best varieties for Texas: Red Norland, Yukon Gold, Red LaSoda, Kennebec
Pacific Coast (Zones 7–10: California, Oregon, Washington)
- Washington and Oregon (Zones 7–8): Plant late March through April after the last frost. The Pacific Northwest’s mild, moist summers are nearly ideal for potatoes.
- Northern California (Bay Area, Sacramento, Zone 9): Plant February through March for spring harvest.
- Southern California (Los Angeles, San Diego, Zone 10): Plant January through February or try a fall planting in September.
California gardeners should note that some morning glory species, unrelated to potatoes but relevant to crop rotation planning, can host the same soil-borne diseases as tomatoes and peppers. Rotate potato plots every three years.
Best varieties for Pacific Coast: Yukon Gold, Russet Burbank, Purple Majesty, French Fingerling
Rocky Mountain and Desert Southwest (Zones 4–7: Colorado, Arizona, Nevada, Utah)
- Colorado Front Range (Denver, Boulder, Zones 5–6): Plant from mid-April to mid-May after the last frost; Denver’s average last frost is May 7.
- Low-desert Arizona (Phoenix, Tucson, Zone 9–10): Plant January through February for a spring harvest before extreme heat arrives; avoid summer planting entirely.
- High-desert Arizona and New Mexico (Flagstaff, Santa Fe, Zones 5–6): Plant late April through early May.
- Nevada (Las Vegas, Zone 9): Plant January through February; Reno (Zone 6) plants in April.
How to Prepare Soil for Potatoes
Great potato harvests start with great soil preparation. Potatoes need loose, well-draining soil so tubers can expand without resistance. Compacted soil produces small, misshapen potatoes.
Ideal Soil Conditions
- pH: 5.0–6.0 is ideal; slightly acidic soil discourages scab disease
- Texture: Loose, crumbly loam or sandy loam; never heavy clay without amendment
- Drainage: Critical; waterlogged soil rots tubers and promotes disease
- Depth: Till or loosen to at least 12 inches deep; 16 inches is better
Soil Amendment Guide by Region
| Soil Type | Common Locations | Amendment Needed |
|---|---|---|
| Heavy Clay | North Texas, Midwest, Pacific Northwest | Add compost and coarse sand; consider using raised beds to improve drainage. |
| Sandy | Florida, Coastal Southeast | Add generous amounts of compost each year to improve moisture and nutrient retention. |
| Rocky | Colorado, Mountain West | Build raised beds and fill them with a high-quality imported soil mix. |
| Alkaline (pH 7+) | Texas, Arizona, Nevada | Apply garden sulfur to gradually lower soil pH. |
| Acidic (pH Below 5) | Southeast, New England | Add lime cautiously to raise soil pH slightly and improve growing conditions. |
Important: Never add fresh manure directly to potato beds; it promotes scab disease. Use only well-composted manure, added in the fall so it finishes decomposing before spring planting.
Read more :How to Grow Potatoes: 10 Easy Tips for Big Harvests
How to Plant Potatoes: Step-by-Step
Step 1: Cut and Cure Your Seed Potatoes
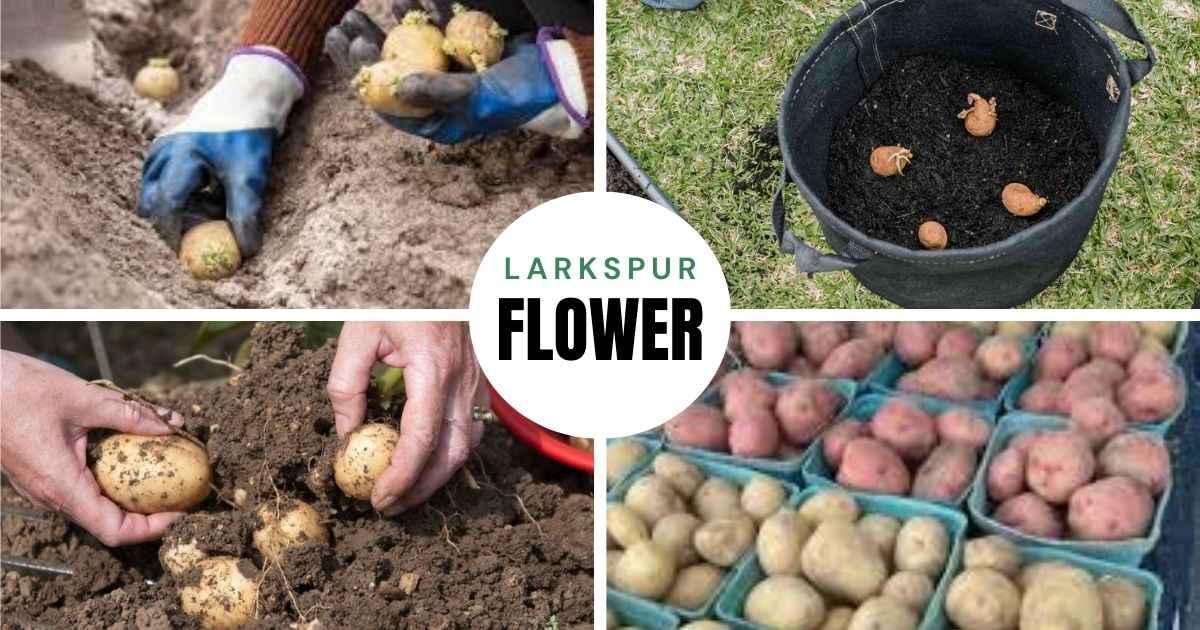
If your seed potatoes are large (bigger than a golf ball), cut them into chunks with a clean, sharp knife. Each piece should be approximately 2 ounces and contain at least two eyes. Small seed potatoes (egg-sized or smaller) can be planted whole.
After cutting, cure the pieces for 24 to 48 hours in a warm, well-ventilated location. This allows the cut surfaces to form a protective callous (called suberization) that prevents rotting and fungal entry after planting.
Some gardeners dust cut surfaces with powdered sulfur for extra disease protection, particularly recommended in Texas and the humid Southeast.
Step 2: Choose Your Growing Method
Traditional trench method (best for in-ground gardens):
Dig trenches 4–6 inches deep and 2.5–3 feet apart. Place seed pieces with eyes facing up, 12 inches apart along the trench. Cover with 3–4 inches of soil initially; you will add more as plants grow.
Raised bed method (best for clay soils, Texas, Florida):
Fill raised beds with a mix of quality garden soil and compost. Plant at the same depth (4–6 inches) and space 12 inches apart. Raised beds warm faster than in-ground soil and drain better, key advantages in wet climates and heavy clay soils.
Container and grow bag method (best for small spaces, apartments, and urban gardeners):
Use containers of at least 10–15 gallons. Fill with 6 inches of high-quality potting mix, place one or two seed pieces, and cover with 3 inches of soil. As plants grow, continue adding soil. Grow bags are particularly convenient; they breathe well, prevent overwatering, and the harvest is as simple as tipping the bag over.
Straw mulch method (best for beginners, loose soil):
Place seed pieces on the soil surface and cover with 6–8 inches of clean straw. As plants grow, add more straw. Harvest is the easiest method; pull back the straw and collect perfectly clean potatoes.
Step 3: Plant at the Right Depth and Spacing
- Depth: 4–6 inches deep; eyes facing up
- Spacing: 12 inches between seed pieces within rows
- Row spacing: 30–36 inches between rows for in-ground growing; 12–16 inches in raised beds
Step 4: Water After Planting
Water thoroughly after planting to settle the soil around the seed pieces. From this point, keep the soil consistently moist but never waterlogged; aim for 1 to 2 inches of water per week from rain and irrigation combined.
Step 5: Hill Your Potatoes. This step is non-negotiable.
When your plants reach 6–8 inches tall, mound soil up around the stems until only the top 2–3 inches of the plants are showing. Repeat when plants grow another 6 inches. Continue hilling until the mounds are 10–12 inches tall.
Why hilling matters so much:
Potato tubers form along the buried portion of the stem, not in the original root zone. More buried stems = more tubers = bigger harvest. Hilling also prevents developing tubers from being exposed to sunlight, which can turn them green and cause them to produce solanine, a mildly toxic compound that makes potatoes taste bitter.
Fertilizing Potatoes: What, When, and How Much
Potatoes are heavy feeders that need consistent nutrition through their growing season. But more fertilizer is not always better; over-fertilizing at the wrong time can reduce yield.
At planting:
Apply a balanced fertilizer (10-10-10) or a potato-specific fertilizer in the trench before placing seed pieces. Do not let the fertilizer come into direct contact with the seed pieces.
2 weeks after planting:
Side-dress with a nitrogen-rich fertilizer to support early leafy growth. Apply 1/2 to 1 cup per 10 feet of row, along the plants.
4 weeks after planting:
Apply calcium nitrate fertilizer to support tuber cell formation. This step is especially important in Florida and the Southeast, where soils can be calcium-deficient.
After flowering begins:
Stop adding nitrogen. Once flowers appear, tubers are actively forming underground; extra nitrogen at this stage pushes leafy growth at the expense of tuber development. This is one of the most common mistakes new potato growers make.
Companion Planting for Potatoes
Strategic companion planting can naturally reduce pest pressure and improve yield:
Plant these near potatoes:
- Marigolds — Repel Colorado potato beetles and nematodes. Plant French marigolds (Tagetes patula) around the perimeter of the potato bed.
- Horseradish — Plant one or two horseradish plants at the corners of the bed. Research from several extension services suggests it significantly deters Colorado potato beetles.
- Beans — Fix nitrogen in the soil, benefiting potatoes grown after them in rotation.
- Basil — Reported to improve flavor and repel aphids.
Never plant near potatoes:
- Tomatoes, peppers, and eggplants share the same diseases (blight and Verticillium wilt); planting them near potatoes dramatically increases disease risk.
- Fennel — Inhibits potato growth.
- Cucumbers — Compete aggressively for the same nutrients.
Common Pests and Diseases: Prevention and Treatment
Colorado Potato Beetles
The most damaging potato pest in the USA, found in every state except Nevada and California (where it is present but less problematic).
Adults and larvae both devour foliage; heavy infestations can defoliate an entire plant.
Prevention:
Rotate crops every 3 years; plant marigolds and horseradish as companions; use floating row covers early in the season.
Treatment:
Hand-pick yellow egg masses from leaf undersides; apply spinosad (an organic-approved pesticide) for heavy infestations; use Bt (Bacillus thuringiensis var. tenebrionis) for larvae specifically.
Aphids
Look for clusters of small soft-bodied insects on new growth and leaf undersides. Aphids cause yellowing and curling leaves, and they leave sticky honeydew that promotes the growth of black sooty mold. They also spread viral diseases between plants.
Treatment:
Blast off with a strong stream of water, apply insecticidal soap, and encourage beneficial insects (ladybugs and lacewings) by planting native flowers nearby.
Potato Scab
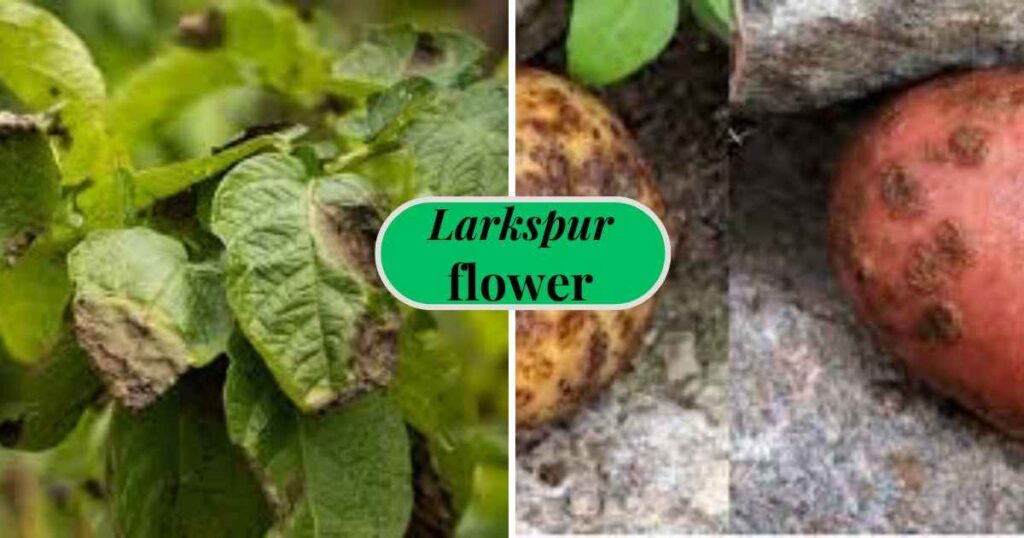
Corky, rough patches on the skin of tubers. Caused by the soil bacterium Streptomyces scabies and dramatically worse in alkaline soil (pH above 6.0).
Prevention:
Maintain soil pH between 5.0 and 6.0; water consistently during tuber development (irregular moisture spikes increase scab incidence); choose scab-resistant varieties like Russet Burbank or Norland; never use fresh manure.
Late Blight (Phytophthora infestans)
The same pathogen that caused the Irish potato famine. In the US, late blight is most problematic in the humid Northeast, Pacific Northwest, and Southeast during wet summers. Symptoms include dark, water-soaked patches on leaves that spread rapidly, killing the entire plant within days.
Prevention:
Plant certified disease-free seed; choose resistant varieties (Elba, Jacqueline Lee, Defender); apply copper-based fungicides preventatively in high-risk regions; never plant near tomatoes; remove and destroy (never compost) infected plant material immediately.
Early Blight (Alternaria solani)
Brown spots with concentric rings (like a target) on older lower leaves. Less devastating than late blight but still reduces yield if ignored.
Treatment:
Remove affected leaves, apply copper fungicide, ensure adequate fertilization (underfed plants are more susceptible), and improve air circulation by proper spacing.
How to Know When Potatoes Are Ready to Harvest
New Potatoes (Early Harvest)
About 2 to 3 weeks after the plants flower, you can dig carefully around the base of one plant and feel for small, thumbnail-sized tubers. These are “new potatoes,” thin-skinned, sweet, and creamy. They do not store well but taste extraordinary when eaten within hours of harvest.
Main Crop Potatoes (Full Harvest)
Wait until the foliage yellows and dies back naturally. At this point, cut back any remaining top growth and leave the potatoes in the ground for an additional 10 to 14 days. This curing period in the ground allows skins to thicken and toughen, dramatically improving storage life.
Choose a dry day to harvest. Use a garden fork, not a spade; forks are less likely to slice through tubers. Insert the fork 12 inches from the base of the plant and gently pry upward, working around the plant until the tubers loosen. Lay the tubers on the soil surface for a few hours to dry in open air.
How to Store Potatoes After Harvest
Proper storage is the difference between potatoes that last six months and potatoes that rot in three weeks.
Step 1: Cure first.
Before storing, cure freshly dug potatoes in a dark, well-ventilated area at 60–65°F for 10- 14 days. Do not wash them; brush off only loose soil. Curing heals minor skin cuts and dramatically extends storage life.
Step 2: Long-term storage conditions:
- Temperature: 40–45°F (a basement, root cellar, or unheated garage in most of the USA)
- Humidity: 80–90% to prevent shriveling
- Darkness: Essential; light triggers greening and solanine production
- Air circulation: Store in mesh bags, wooden crates, or cardboard boxes with holes; never in sealed plastic
Step 3: Monitor regularly.
Check stored potatoes every two weeks. Remove any that show soft spots, green patches, or signs of rot immediately; a single rotting potato can accelerate spoilage in the entire batch.
Do not refrigerate potatoes;
Temperatures below 40°F convert starch to sugar, altering the flavor and causing them to brown when cooked.
Seasonal Planting Calendar: Quick Reference by US Region
| Region | States/Areas | Spring Planting Time | Fall Planting Time |
|---|---|---|---|
| Northeast | New York, New England, Pennsylvania | April–May | Not Applicable |
| Midwest | Ohio, Illinois, Michigan, Missouri | April–May | Not Applicable |
| Southeast | Georgia, North Carolina, South Carolina, Tennessee | February–March | Not Applicable |
| Florida | All Zones | December–February | Not Applicable |
| North Texas | Dallas, Fort Worth | Late February–March | August–September |
| South Texas | San Antonio, Rio Grande Valley | January–February | September |
| Pacific Northwest | Washington, Oregon | March–April | Not Applicable |
| California | All Zones | January–March | September–October |
| Low Desert | Phoenix, Las Vegas | January–February | Not Applicable |
| Mountain West | Colorado, High-Elevation Arizona | April–May | Not Applicable |
Conclusion
Growing potatoes is one of the most reliably rewarding things you can do in an American home garden. They feed you well, they grow in small spaces, they come in beautiful varieties your neighbors have never seen, and, if you have never grown them before, the harvest is genuinely one of gardening’s great surprises: all that abundance that was quietly happening underground while you were going about your days.
The key to success is not complicated. Get certified seed potatoes. Match your planting time to your specific region and zone. Prepare your soil well. Hill consistently. Fertilize at the right stages and stop at the right stages.
And then let the plants do what potatoes have done for thousands of years: fill the ground beneath them with something wonderful. Pick your variety, check your zone planting window, and get your seed potatoes ready. Your best harvest is a season away.
Frequently Asked Questions
What is the best method for planting potatoes in small spaces?
Grow bags and containers work exceptionally well for small spaces. Use a minimum 15-gallon container per two seed potatoes. Fill with quality potting mix, add seed pieces, and cover with 3 inches of soil.
As plants grow, keep adding soil to the container; this mimics the hilling process and maximizes tuber production per square foot.
Can I plant potatoes from the grocery store?
It is strongly discouraged. Grocery store potatoes are usually treated with chemical sprout inhibitors that prevent germination. More importantly, they may carry soil-borne diseases, including blight, that can contaminate your garden soil for years. Always buy certified seed potatoes from reputable garden suppliers.
Why are my potatoes turning green?
Green potatoes are exposed to light during development, either because the tubers were pushed to the surface or because hilling was not thorough. Green skin indicates the presence of solanine, a mildly toxic compound that imparts a bitter flavor.
Cut away all green portions before eating, or discard badly affected potatoes. Prevent this by hilling consistently and keeping tubers covered.
How many potatoes will one plant produce?
Under good growing conditions, one potato plant produces 3 to 5 pounds of potatoes, which can be roughly 5 to 10 individual tubers, depending on variety. With optimal conditions, spacing, fertilization, and hilling, some gardeners achieve 7 to 10 pounds per plant from vigorous varieties.
When should I stop watering potatoes?
Reduce watering significantly once the foliage begins to yellow and die back. Stop watering entirely about 2 weeks before planned harvest. Dry soil during this final period helps toughen the skin, reducing storage rot and improving flavor.
Can I grow potatoes in Florida?
Yes, but Florida gardeners must time plantings for the cool, dry season rather than spring. Plant in December through February depending on your location in the state. Use raised beds elevated at least 10 inches for drainage, add generous amounts of organic compost, choose early-maturing varieties (70 days), and fertilize in split applications.
Florida’s sandy soils require more fertilizer and more frequent watering than other regions.
What should I plant after potatoes in crop rotation?
Legumes, beans, peas, and clover are the ideal follow-up crops after potatoes. They fix atmospheric nitrogen back into the soil, replenishing the nutrients potatoes consumed.
Avoid planting tomatoes, peppers, or eggplants in the same spot for at least two to three years after potatoes, as they share the same diseases.
Do potatoes need full sun?
Yes, potatoes need 6 to 8 hours of direct sunlight daily for the best yield. They will grow in partial shade but produce fewer, smaller tubers.
In very hot climates (South Texas, Arizona, and Southern California), afternoon shade actually helps by keeping soil temperatures below 85°F, which prevents tuber development.
How do I know if I have late blight versus early blight?
Early blight causes brown spots with a distinctive concentric ring pattern (like a bullseye target) on older lower leaves and spreads slowly. Late blight spreads rapidly and produces irregular dark green to brown water-soaked patches that often have a pale green halo.
Late blight can kill an entire plant in days during warm, wet conditions; remove infected plants immediately and do not compost them.
