
Introduction
In case the aloe vera plant in your possession is not the very succulent that it should be, the solution is to repot it. Learning how to repot an aloe vera plant clearly boosts its health as well as its beauty, especially if the aloe needs a larger pot or the nutrient level in the current soil is low. It is a tough succulent, but providing the right soil, careful handling, and a soft touch during repotting will ensure that it is neither stressed nor harmed.
The information presented in the article will not only provide you with a complete walkthrough from A to Z of the different aspects of repotting aloe vera plants, but also the splitting of an aloe vera plant and even repotting an aloe vera plant either outdoors or indoors.
Step-by-step Guide to Healthy Growth
Plant Aloe Vera Repotting Rationale
When the aloe vera plants can achieve their full size, they are very attractive. Soil blocks and root congestion will certainly decrease the air space. Conversely, repotting results in more vigorous roots, better drainage, and new soil.
A few of the signs that show it is time to repot your aloe vera plant are:
- Soil is either drying or compacting very quickly.
- Either the plants are toppling over, or one side is just too heavy.
- In case any of these events occur, then it is time to learn the right way of repotting an aloe vera plant.
Choosing the Right Pot
The very first step of a successful repotting process is the selection of a proper pot. A clay or terra-cotta pot would be a great choice as it lets the extra moisture evaporate. Since aloe vera prefers to be a little bit dry, it follows that good drainage is of utmost importance.
The following guide can be utilized to pick the most suitable pot for your plant:
- At least a drainage hole should be there.
- Avoid plastic or metal containers as they will keep the moisture too much.
How to Repot an Aloe Vera Plant: The Best Soil for Houseplant Aloe Vera
Root rot is an issue that an improper soil mixture for aloe vera can cause. Cactus or succulents mixed that allow quick water drainage are, therefore, the best option for Aloe vera indoor planting.
Moreover, you can learn to make the soil for aloe vera at home by mixing:
- Two parts of potting soil
- One part perlite or sand
- One part small gravel or pumice
This blending not only shields the plant from getting ruined due to excessive watering, but it also allows essential air circulation.
How to Repot an Aloe Vera Plant
Get the plants ready by having the pot and the soil. Just follow the instructions below for a no-hassle process:
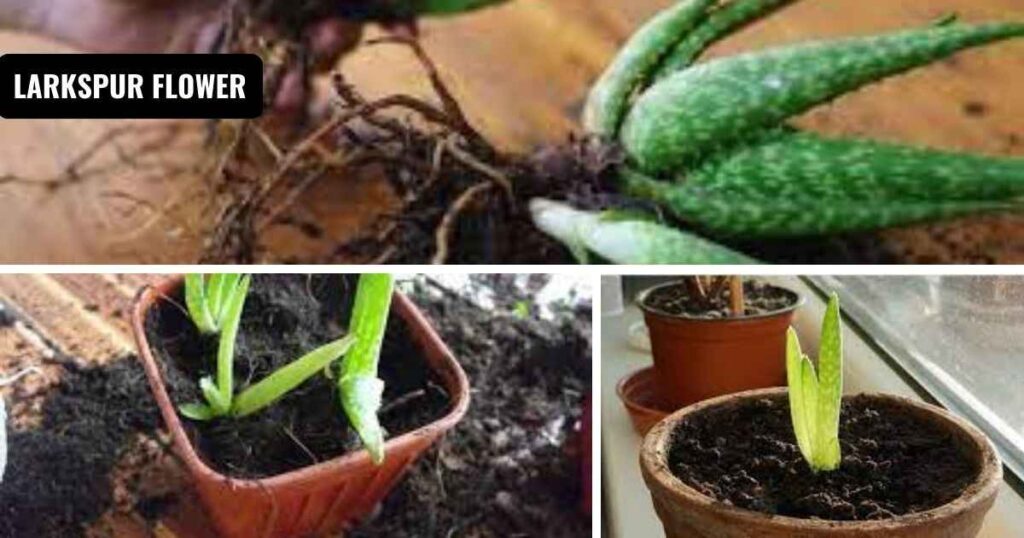
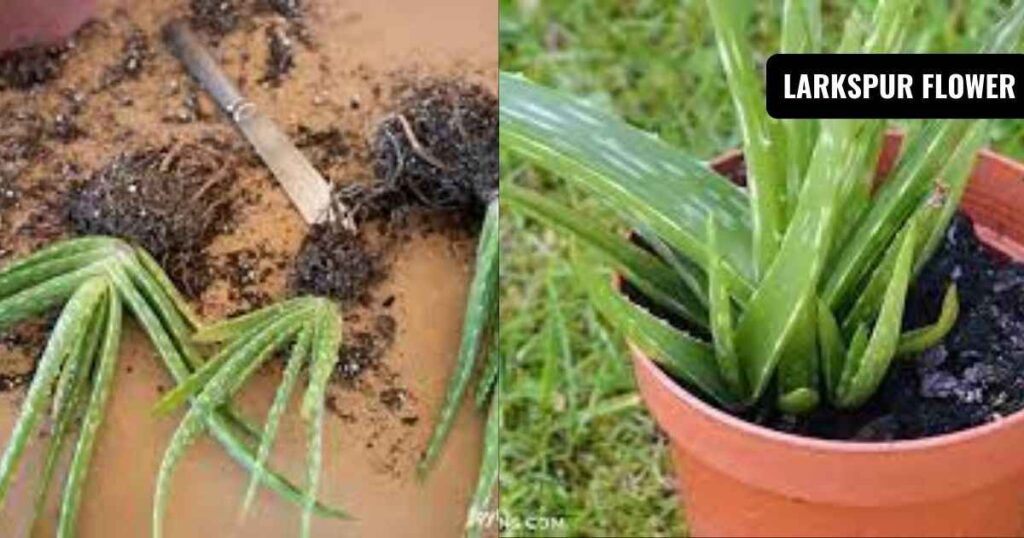
Step 1: Plant Removal without Hurting
The aloe vera plant should be removed from the old pot with maximum care. The pot ought to be gently inclined and the plant supported at its bottom initially.
Step 2: Check the Roots
The roots that are decayed or damaged are indicated by dark brownish to blackish color, whereas light-colored and firm roots indicate good health. To remove the black, dead roots, clean and sharp scissors should be used, as this will not only make the plant easier to take care of in the present but also prevent possible future infections.
In case you are wondering about the transplanting procedure of rootless aloe vera, place the plant in fresh dirt and let it take root by itself. The right conditions will eventually lead to the production of new roots by aloe vera.
Step 3: Fill the New Pot
First of all, stones should be laid on the bottom of the pot to improve the drainage. Next, the soil mixture that has been prepared can be put into the pot until it is half full.
Aloe vera should be positioned in the middle, and dirt should be placed around it; the base of the leaves should be slightly above the soil line. At this point, the soil can be pressed a little to steady the plant, but not too much.
Step 4: Water Lightly
Watering the plant should be done only when the soil has become thoroughly dry. This will allow the roots to adapt to their new environment.
Aloe Vera Plant Division
The division process starts when your Aloe starts producing new plants (also called pups or offsets). The skill of separating an aloe vera plant will ensure that the wonderful new plants will have enough room to grow.
- Using a sterile knife, carefully cut the offsets off from the mother plant.
- Each pup should have at least a few roots with it.
- To speed up the process of healing, dry them for one day.
- Mix the same soil for each one and plant them one by one.
Moreover, now is a great time to swap plants with your buddy or to bring in more of your favorite aloe vera varieties to your collection.
How To Repot An Aloe Vera Plant Shock Lessening
Aloe vera plants are sometimes affected by transplant shock, even when the handling is very careful. The foliage coloration may turn pale, the plant might droop, and for some time, it may even cease growing. To prevent shock:
- The location of the plant should be a spot with no direct sunlight for at least two days.
- Overwatering the soil should not be allowed.
- Right after repotting, do not fertilize the plant.
- Your aloe vera will recover and produce new growth in two to three weeks.
Will the repotting of Aloe Vera in winter be fine?
Aloe vera gets very few benefits from the winter period repotting, but such a task is still doable. Spring is the best time, as the plant is full of vitality and growth. In case winter is the only season for repotting, then do not water Aloe very much and position it in a warm and bright area. The winter season is already a time for slow growth in the plant and thus, slow adaptation to new soil.
How To Repot An Aloe Vera Plant Without Soil
Repotting the aloe vera plant without soil is a way that some gardeners try out as a more creative method. Among these alternatives are hydroponic systems, perlite, and pumice. These techniques work best in indoor settings where the water supply is controlled and there is sufficient air circulation. It is, however, recommended that these methods be applied only for experimental purposes or for decorative displays, as aloe vera normally thrives in soil.
Conclusion: How to repot an aloe vera plant
The ability to learn how to repot an aloe vera plant is a simple but very important skill for anyone who is casual about caring for plants. The plant will live many years with the right pot, right hands, and good-drained ground. If you follow these tips, very soon you will get a big and beautiful, colorful aloe plant that will not only be the best in your house but also the best source of its healing properties.
FAQs: How to repot an aloe vera plant
How often do you change the pot for an aloe vera?
The repotting works should be done every 2-3 years or whenever the pot is filled with the plant.
Can aloe vera live on regular potting soil?
Definitely not; the cactus or succulent mix is the sole one that fits.
Is my aloe plant indicating root rot in any way?
Brown, soft, or foul-smelling roots are the signs of death. Before replanting, cut off the rotten roots.